How to Start Bullets Lists Over Again in Mac Pages
-
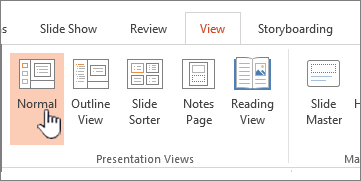
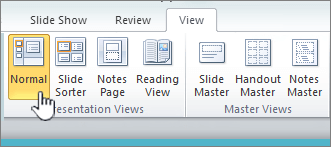
On the View tab, in the Presentation Views group, click Normal.
-
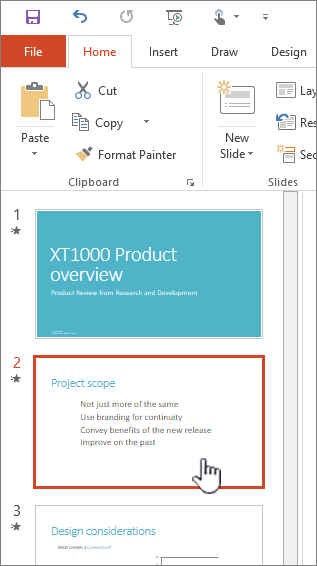
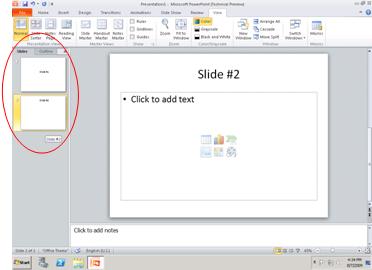
On the left side of the PowerPoint window, click a slide thumbnail that yous want to add together bulleted or numbered text to.
-
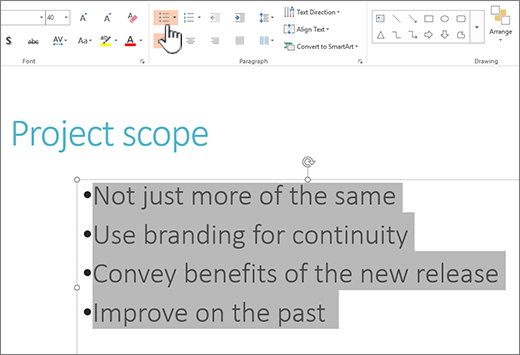
On the slide, select the lines of text in a text placeholder or tabular array that y'all want to add bullets or numbering to.
-
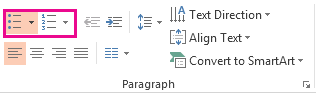
On the Home tab, in the Paragraph grouping, click Bullets
 or Numbering
  .
.
Notes:
-
To alter all lines of text, select the outline of the text object, and then utilize the bullet or numbering.
-
To increment or decrease the indent and change the spacing between a bullet or number and the text, run across How do I increase or decrease the space between a bullet or number and the text in a line? in this article.
-
Change the color and style of bullets, and understand the limitations
You tin can change the color, style, or size of the bullets or numbers in your PowerPoint presentation, and you can alter the number you desire to start from.
-
To change 1 bullet or number, identify the cursor at the outset of the line that you want to change. To change multiple bullets or numbers, select the text in all of the bullets or numbers that you want to change.
-
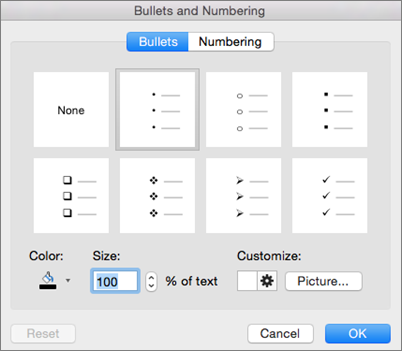
Click Home, click the arrow next to either the Bullets or Numbering push button, and and then click Bullets and Numbering.
Tip:To quickly change the style of a bulleted or numbered listing, just click the style you lot want in the list that appears when you click the pointer side by side to Bullets or Numbering.
-
In the Bullets and Numbering box, on either the Bulleted tab or the Numbered tab (depending on what kind of list you're working with), pick the style changes that y'all desire to make, such as:
-
Bullet or number style
-
Colour
-
Size (to resize a bullet or number so it'due south a specific size in relation to your text, click Size, and enter a pct)
-
Starting number (on the Numbered tab, enter the number you lot desire in the Start at box)
-
Pictures (to use a picture as a bullet, on the Bulleted tab, click Picture, and gyre to find a picture)
-
Symbols (to temporarily add a character from the symbol list to the Bulleted tab, on the Bulleted tab, click Customize, click a symbol, and then click OK. You can apply the symbol to your slides from the style lists)
-
SmartArt graphics (to convert an existing bulleted or numbered listing to a SmartArt graphic, click Home > Convert to SmartArt)
Tips:
-
To change the format of just one or some of the bullet or number styles in a listing, such equally the color or size, place the cursor at the showtime of the line that you want to change before opening the Bullets and Numbering box. Your changes will apply simply to the selected lines.
-
To adjust the alignment of items in a list, see How do I increase or decrease the space between a bullet or number and the text in a line? in this commodity.
-
Apply custom styles to multiple slides
The best manner to utilize custom listing styles to all slides in your presentation is to modify the slide master. Whatsoever list customization you brand to the slide primary will be saved and applied to all your slides. Y'all tin too edit or create one or more slide layouts that include your customized list styles, and add these layouts to your presentation wherever y'all want to use your listing styles.
List limitations in PowerPoint
In that location are a few things you can't do with lists in PowerPoint that you lot can in other Office programs, such equally Give-and-take. For example, PowerPoint does not support:
-
Decimal numbered lists (1.ane, 1.two, and and then on).
-
Defining new number formats (you lot must choose from the default prepare of styles offered on the Numbered tab in the Bullets and Numbering box).
-
Applying bold, italic, or underline formatting to bullets or numbers (any formatting will be applied to the entire selected line or list).
-
Nested lists (yous can press Tab or click Increase List Level
 to create the same effect, merely a new indented bullet or number style is not set automatically past PowerPoint).
Frequently asked questions
Select a heading beneath to open information technology and come across the detailed instructions.
Check to make certain you're putting bullets or numbers in a Text box, and not a Title box. In a Text box, you get a number or bullet every time y'all press Enter. If you printing Ctrl + Enter, yous go boosted lines without bullets (good for details or notes on a bulleted or numbered line).
In a Title box, the text is expected to exist a unmarried line heading or title. You tin can use numbers or bullets, merely information technology treats all lines of text equally a single line, resulting in a single bullet or number.
To stop creating bullets or numbers and return to text, click Bullets or Numbering again to plough it off.
Yous can also press Enter and so press Backspace to erase the bullet or number. You can then commencement adding text, or press Enter to add together extra empty lines.
To create an indented (subordinate) list within a list, place the cursor at the commencement of the line that yous want to indent, and then on the Dwelling tab, in the Paragraph grouping, click Increase List Level .
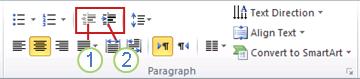
1. Decrease List Level (indent)
ii. Increase List Level (indent)
To movement text back to a less indented level in the list, identify the cursor at the offset of the line, and so on the Dwelling house tab, in the Paragraph grouping, click Decrease List Level.
To increase or decrease the space between a bullet or number and the text in a line, identify the cursor at the start of the line of text. To view the ruler, on the View tab, in the Show group, click the Ruler check box. On the ruler, click the hanging indent (as shown in diagram beneath) and drag to alter the space between the bullet or number and the corresponding text.
In that location are three different markers that appear on the ruler to indicate the indentation defined for a text box.

1. first line indent – Indicates the position of the bodily bullet or number character. If the paragraph is non bulleted and then this indicates the position of the beginning line of text.
two. left indent – Adjusts both the Starting time Line and Hanging indent markers and maintains their relative spacing.
3. hanging indent – Indicates the position of the actual lines of text. If the paragraph is non bulleted then this indicates the position of the second line (and subsequent lines) of text.
To change the default bullets in PowerPoint on your Windows PC, follow these steps.
-
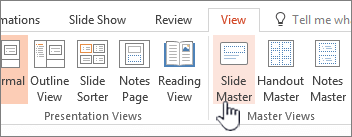
On the View tab, click Slide Master.
-
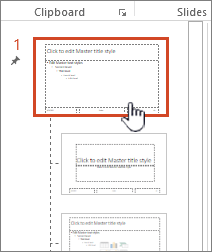
Select the Primary slide (the first, larger slide in the thumbnail panel).
-
Click the Abode tab.
-
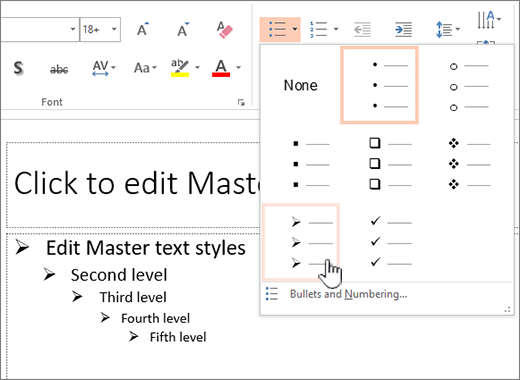
Select i or more of the bulleted lines in the samples.
-
Click the down arrow on the Bullet button, and choose the way you want for a default.
-
Echo if you take unlike bullets for different lines.
-
When yous're done updating the bullet styles, click the Slide Master tab, and then click Shut Chief View.
When yous insert a slide or a text box for bullets, information technology will reflect your new bullet defaults.
For more information working with masters, see Alter a slide master.
Use bullets or numbers to nowadays lots of text or a sequential process in a Microsoft PowerPoint 2010 presentation.
-
On the View tab, in the Presentation Views group. click Normal.
-
On the left side of the PowerPoint window, in the pane that contains the Outline and Slides tabs, click the Slides tab, and and so click a slide thumbnail that you want to add bulleted or numbered text to.
-
On the slide, select the lines of text in a text placeholder or table that yous desire to add bullets or numbering to.
-
On the Home tab, in the Paragraph group, click Bullets
or Numbering .Notes:
-
To modify all lines of text, select the outline of the text object, then apply the bullet or numbering.
-
To increase or subtract the indent and alter the spacing between a bullet or number and the text, see How practice I increase or subtract the space between a bullet or number and the text in a line? in this article.
-
Insert a bulleted or numbered list
-
On the View tab, click Normal.
-
Click in the text box or placeholder where yous desire to add bulleted or numbered text.
-
On the Home tab, in the Paragraph group, click Bullets
or Numbering , and begin typing your list. Printing Render to create a new list item.Or, select lines of text that are already on your slide, and and so click Bullets or Numbering to format that text every bit a list.
Change the look of a bullet or number
-
To change one bullet or number, identify the cursor at the offset of the line that you desire to change. To change multiple bullets or numbers, select the text in all of the bullets or numbers that you want to modify.
-
On the Domicile tab, click the arrow next to either the Bullets
or Numbering button, and then click Bullets and Numbering. -
In the Bullets and Numbering dialog box, do one or more of the post-obit:
To apply a picture as a bullet, on the Bullets tab, click Film, and and so curlicue to find a picture icon that y'all want to use.
To add a character from the symbol list to the Bulleted or Numbered tabs, on the Bullets tab, click the gear icon
 under Customize, click a symbol, and so click OK. You lot can apply the symbol to your slides from the fashion lists.
To modify a numbered listing to beginning at a certain number, on the Numbering tab, blazon the number in the Start at box.
To change the colour or size of bullets or numbers, choose an option nether Colour or Size.
Alter the indent or spacing between text and points
-
To create an indented (subordinate) list within a list, place the cursor at the start of the line that you desire to indent, and and then on the Home tab, click Indent More
 . You lot can also printing TAB to increase the indent.
 -
To move text back to a less indented level in the list, place the cursor at the first of the line and click Indent Less
 .
. -
To create spacing betwixt listing points, on the Home tab, click Line Spacing
 .
.
Remove bullets and numbering
-
Select your list, and on the Habitation tab, click the Bullets
or Numbering buttons to remove the formatting.
Format text as a listing
-
Go to the slide that you want to add together list formatting to.
-
On the slide, select the lines of text in a text placeholder or table that you want to add bullets or numbering to.
-
On the Domicile tab, in the Paragraph grouping, click Bullets
or Numbering . Note:To change all lines of text, you tin select the outline of the placeholder box or text that contains the text, and then apply the bullet or numbering.
Default bullet or numbering style is immediately applied to your selected text. To encounter a gallery of formatting options for your listing, click the small downward pointing arrow on the Bullets or Numbering button:

Effigy 1: Bulleted list: the style gallery

Figure 2: Numbered list: the manner gallery
-
To modify the indentation level of the list, select the list and so, on the Home tab of toolbar ribbon, click Increase Indent
or Decrease Indent  .
.
Select text
To select a give-and-take: Signal at the word and double-click the mouse.
To select a paragraph: Point at a give-and-take in the paragraph and triple-click.
Source: https://support.microsoft.com/en-us/office/add-bullets-or-numbers-to-text-a6f1b87e-fca8-47da-ade9-5d99b7f41f04
0 Response to "How to Start Bullets Lists Over Again in Mac Pages"
Post a Comment